We have been trying to be more "green" since my sister-in-law got the job as recycling coordinator in our county. We've learned a lot, trying to reduce, reuse and recycle. I recently started seeing a lot on pinterest about making your own cleaners and what not, and decided it may be nice to share with you what we make our self, and what we do to what we have to make it stretch!
These are the products i use daily, and for the most part i like them as much if not more than store-bought. The biggest bonus is not only being green, or saving money (which you will save a lot over time), but just the fact that the cleaners that clean my dishes, counters, and clothes are chemical free, and safe for my family to use. . . did you know that the simplest things as dryer sheets contain harmful carcinogens? Below i have Instructions for my fav household DIY supplies, and the printable labels i used on my bottles, incase you want some yourself!!
Laundry Detergent
Ingridients Needed:
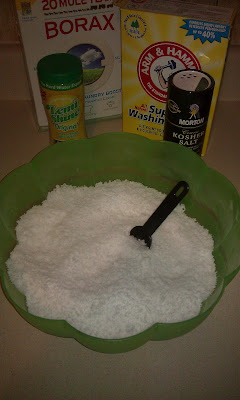
Borax
Washing Soda
Oxi Clean (optional but i think it helps)
Washing soap (fels-naptha, or lye soap)
Everything here can be found in the laundry isle at walmart, unless you choose to use lye soap (which smells and cleans better depending on where you get it, but its hard to find. . . my mom makes it tho ;)
1 Bar soap
1 Cup Borax
1 Cup Washing Soda (not baking soda)
1 Cup Oxi-Clean
Directions:
Grate up the soap with an old cheese grater, and toss with all other ingredients.
I usually toss it in the blender in small batches and blend it a bit so it grinds the soap into a finer mix, you don't have to do this though.
Best part. . . you only have to use 2tbsp per load!! I use 3 Tbsp per load on my extra large loads.
Don't expect it to be sudsy, this doesn't mean it isn't cleaning. . . it took me a bit to wrap my mind around that too!
Above is a close-up of the texture.
Dishwasher Soap

Ingridients:
1 cup borax
1 cup washing soda
1/2 cup kosher salt
1/2 cup lemi-shine
(or unsweetened lemonade powder)
Love this stuff!!
All you do is mix it all together, and let it dry out for 24 hours (stirring occasionally)
Then store in an airtight container. . . i put 1-2tbsp in both compartments.
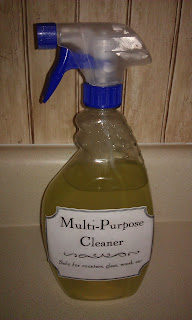
Multi-Purpose Spray Cleaner
This stuff is the best!! Doesn't stink like most vinegar based diy sprays, and still has the vinegar and lemon juice that not only clean. . . but disinfect!! yep thats right, you can disinfect with homemade household cleaners!! If you want a nicer scent, just add a few drops of essential oils, or more cleaning power, a tsp or more of dishsoap!!
Ingredients:
2 Tbsp Borax
4 Cups hot water
1/4 cup white vinegar
3-4 Tbsp lemon juice
Dissolve Borax in hot water, add other ingredients and pour into an old 32oz spray bottle. Shake well
DIY liquid Fabric Softener
6 Cups hot water
3 Cups Vinegar
2 Cups Conditioner
Dissolve conditioner in hot water and then stir in vinegar.
Coolest thing about this is that with all the different conditioners out there you can have about any scent you want! and if you look below you can also make your own dryer sheets and wrinkle release spray / fabreeze out of you fav liquid fabric softner!


DIY Wrinkle Release Spray
You can stretch your fav fabric softeners use out A LOT!! and your clothes will still smell great!
Just mix
1 part fabric softener
5 parts water
in my 32oz spray bottle i mixed:
1/2 cup softener and 3 1/2 cups warm water
shake it up and spray it directly on clothes or onto strips of fabric like i do.
the strips above are microfiber clothes that i cut in half. . . i spray about 10-15 sprays on each and then toss it in the dryer. . . homemade dryer sheet!! yes!! and the clothes smell great. . . its an awesome way to get rid of your commercial dryer sheets! And you get hundreds of loads from one bottle!!
you can take this same method and just dilute it even more (1 cap wrinkle release + fill rest with water) and you have homemade fabreeze!!!
if you like physical dryer sheets you can make them like so:
cut strips of felt, or cut cello sponges in half
pack in container
cover with mixture of 4 parts softner to 10 parts water
cover, shake, and let soak for 2 hours or more before using.
when ready to use, just wring excess out and toss in dryer. . . works like a charm
when dry just pack back in container and reuse!!
I used containers i have laying around the house, and ones i recycled :) . I made my own labels in word, and printed them on regular paper. . . then glued them on with modge podge (you can also use regular elmers school glue) I just smeared glue all over back side. . . pressed it on container. . . then smeared it over outer label to seal it.!! easy as pie!! lol!!
below are the labels i made. . . along with labels (for some) to go on the back of the containers too which include the instructions/ingredients for remaking it!!!
just click on it to bring it up full size. . . right click, and save it to your pc. . . then print it out!


