Showing posts with label diy. Show all posts

Thursday, October 1, 2015

Meal Organization

   As a wife/mom, one of my obvios jobs is preparing daily meals. Along with that, one of my most dreaded tasks has always been deciding what we were going to have for supper. I will open the fridge and stare blankly, then I will wonder to the pantry and do the same, and then back and forth to see what I have the all the ingredients for etc. Then call to the family for ideas only to hear "doesn't matter", or "I don't care". Lol, only really,  no help.
    A while back I saw an idea on pinterest for a meal board.  I made one.  It was the one in the photo frame with the horizontal clothes pins,  one for each day of the week,  holding a card with a meal written thereon. Really neat.  I kept losing cards, and broke off a couple clothes pins. ..we're rough here,  so I decided to use the same concept,  inside a glass frame, using the glass as a dry erase board.  It turned out great!
 

This did help my meal Organization,  but what I came up with next, really went the extra mile.  Using the same thought,  I printed out a list (organized by meat type) of the meals I make.  When I make my list for grocery shopping, I look at this,  and decide what I want to make for the week, and make my list from there.  Then, once home from shopping,  I circle all the meals that I have everything to make,  so no more going from fridge to panty trying to figure out what I 'can' make, it's right there on the wall!  Once a particular meal has been prepared,  I erase the circle from around it. Simple! 


I printed both these out using a regular ole word processing app, nothing fancy, and printed on regular white printer paper, and trimmed the excess to fit in an 8x10 frame. Dollar store dry erase makers are only $1 abs work fine :)

Hope this helps someone out there with their meal planning.  Time is precious, save it when you can :)


Tuesday, September 22, 2015

New style love

Hi all!
I decorate,  and redecorate, over and over (as do most women or sahm's anyway). I've always loved antiques and no matter my style preference at the time,  I try to add those in there.  I had went country,  then primitive (and I still LOVE all things prim) but I desired color.  Something that felt light, bright, and fun. In my last post I showed some of my new style I've fallen in love with.  I guess it's a mix of antique/shabby chic. I started with just aqua as my color (I seriously love aqua).I had some antique mason jars that I love, and made a few signs and what not. I painted all my trim and cabinets a bright white.  I must say,  whatever you call it,  I'll call it antique chic, I love it!  DIY everything here we come!  :p

An example of my style


I made this burlap wreath for the front door, in keeping with this style.  I love the way it turned out. I attatched this wooden flower I made. I cut the flower shape out of luan, sanded and painted it,  aqua (i❤aqua) and painted the middle with home made chalk board paint via pinterest. (Black craft paint+plaster of paris)

Thursday, January 8, 2015

Diy baby knot hat! Tee shirt upcycle Soo cute!


Its cold outside, and our babies are bald!! lol! lets make some hats!


For starters, I traced an old knot hat i had, but made it a little bigger all around (needed it a size up) but i also found a printable one if you wanted your own at prudentbaby  HERE I really made mine the same way ;)

I started with an old tee shirt, and my pattern.
I missed the photo of step one, but pretty much as you would imagine, i laid the tee flat inside out,  traced my pattern (right on the bottom hem so i could use it) and cut it out/sewed it together, 

 I used my new serger for this, but have made them before with regular stitch followed by a zigzag on the outside to reinforce it. This is what i have now. (see the tee hem at the bottom)


Next step is to fold the bottom up evenly as shown and pin in place


a zig zag stitch is used to sew right along this seam


now turn inside out and press seams flat 


tie knot in top as wanted. you can fold the bottom up again or not, however you like... cute right


we will let the reborn doll model it here lol


you could also embellish them with buttons, flowers, bows, etc.
I made a couple for some friends of mine.  I just hand sewed little Initials on that i cut out of felt. Simple but made them so much more special! 


Thanks for stopping by! Happy Crafting!


Upcycle! Diy girls skirt from old hoodie!


I love to upcycle! Partly because I'm a creative spirit, and love to make things, and then also because I have a problem throwing anything away.

I had this Cabela's hoodie which I loved. It had barely been worn when I got wood glue (which never would come out despite all my pinterest stain removal efforts) all over the sleeve. I kept it for over a year (because I cant throw things away, remember). Whilst making an effort to get rid of some old winter wear I drug it back out, and came up with this cute idea... a skirt for my big girl!

I started simply with the sweat shirt

(notice i already started chopping then thought... may want pics of this) 

Then i cut the bottom off
 (I left alot above pocket for it to be approx knee length, would look even cuter, shorter)

I also cut the string part of the hood off, with about 1.5" of fabric in tact to be the waist band ( you may have to use something else, but this fit my girl perfect... and its an instant drawstring if it were too big.


 I turned the skirt part inside out and marked an inch or so wider than the waist of a nice fitting skirt on either side, and sewed in a straight line (or straight as I could) from that mark to the hem band on either side.


I sewed the hoodie string part into a circle right sides together to finish the waistband,


and marked the middle and both sides of it, and the skirt body with pins and pinned them both together, right sides together.


I then sewed these two pieces together (I used my new serger. eekkk!! best gift ever) stretching them out as I went so they were the same size.


Then just turned inside right, and ironed the seams down....Voila!!


  Adorable with tights, and my girl said its super comfy! Win win!


Friday, August 23, 2013

DIY Barbie Doll House


DIY Barbie House!
This is the dollhouse I made for my daughter. It had to be slim to fit in her room.

I used all 1x10 shelving board, and luan for backing it
I simply cut out wood pieces like a shelf, and angled the top like a roof.
I didnt take many pics of this, by the time I thought to take the first pic, i had all pieces together and the roof painted black already lol.


Here it is with the backing cut and nailed on


I painted it flat white first for primer, then painted each room


for flooring, I found wood look contact paper at the dollar store, just cut to size and stick down!!
So pretty!!! She was thrilled!


and here is a quick glimpse into each room (except top, its just storage for now)


The bedroom. I made the bead, its in my previous post. The picture is a small craft frame with a picture of barbie i printed.


Bathroom


Living room 


Ariel watching spongebob lol


the kitchen (this was a repaint to match the table she had)

here is the before pic

Rapunzel fixing her man some tea, lol


Monday, August 12, 2013

DIY Barbie Doll Furniture


Barbie!


My little girl is really into Barbie right now. She is 7 and has had barbies for years but is just now really into playing with them.  She wanted a doll house (as any girl would) and I was unable to find an affordable one which would fit in her tiny room where it needed to be, so I made one. 

The doll house I made was perfect for her, but now we needed furniture. After seeing the prices of furniture sets in toy stores I knew I had to use my craftiness on it!  I made some things from scratch, and re-purposed some existing items. Below is what ive been working on. . . hope it helps you if you too are looking for cheap doll furniture! :)

Bedroom:

Dresser 
Note: (i realize these pics are sideways and am not tech savy enough to fix sorry)
We had a dresser in a not so hip pink, so we spray painted it black.


i put tape around the knobs so they wouldn't get painted, and sprayed away!


For the mirror, I found a tiny mirror out of an old purse and used painted popsicle sticks as a frame.  I hot glued the mirror to a square of cardboard (old cereal box lol) and then hot glued the frame around it. (I cut the angles on the sticks with good scissors)


Here is the newly painted dresser and mirror!


Now for a bed!  

I saw the idea for this bed online on another blog. I cannot find it anymore but when I do I will post the link for proper credits. They did awesome and I copy-catted it :)

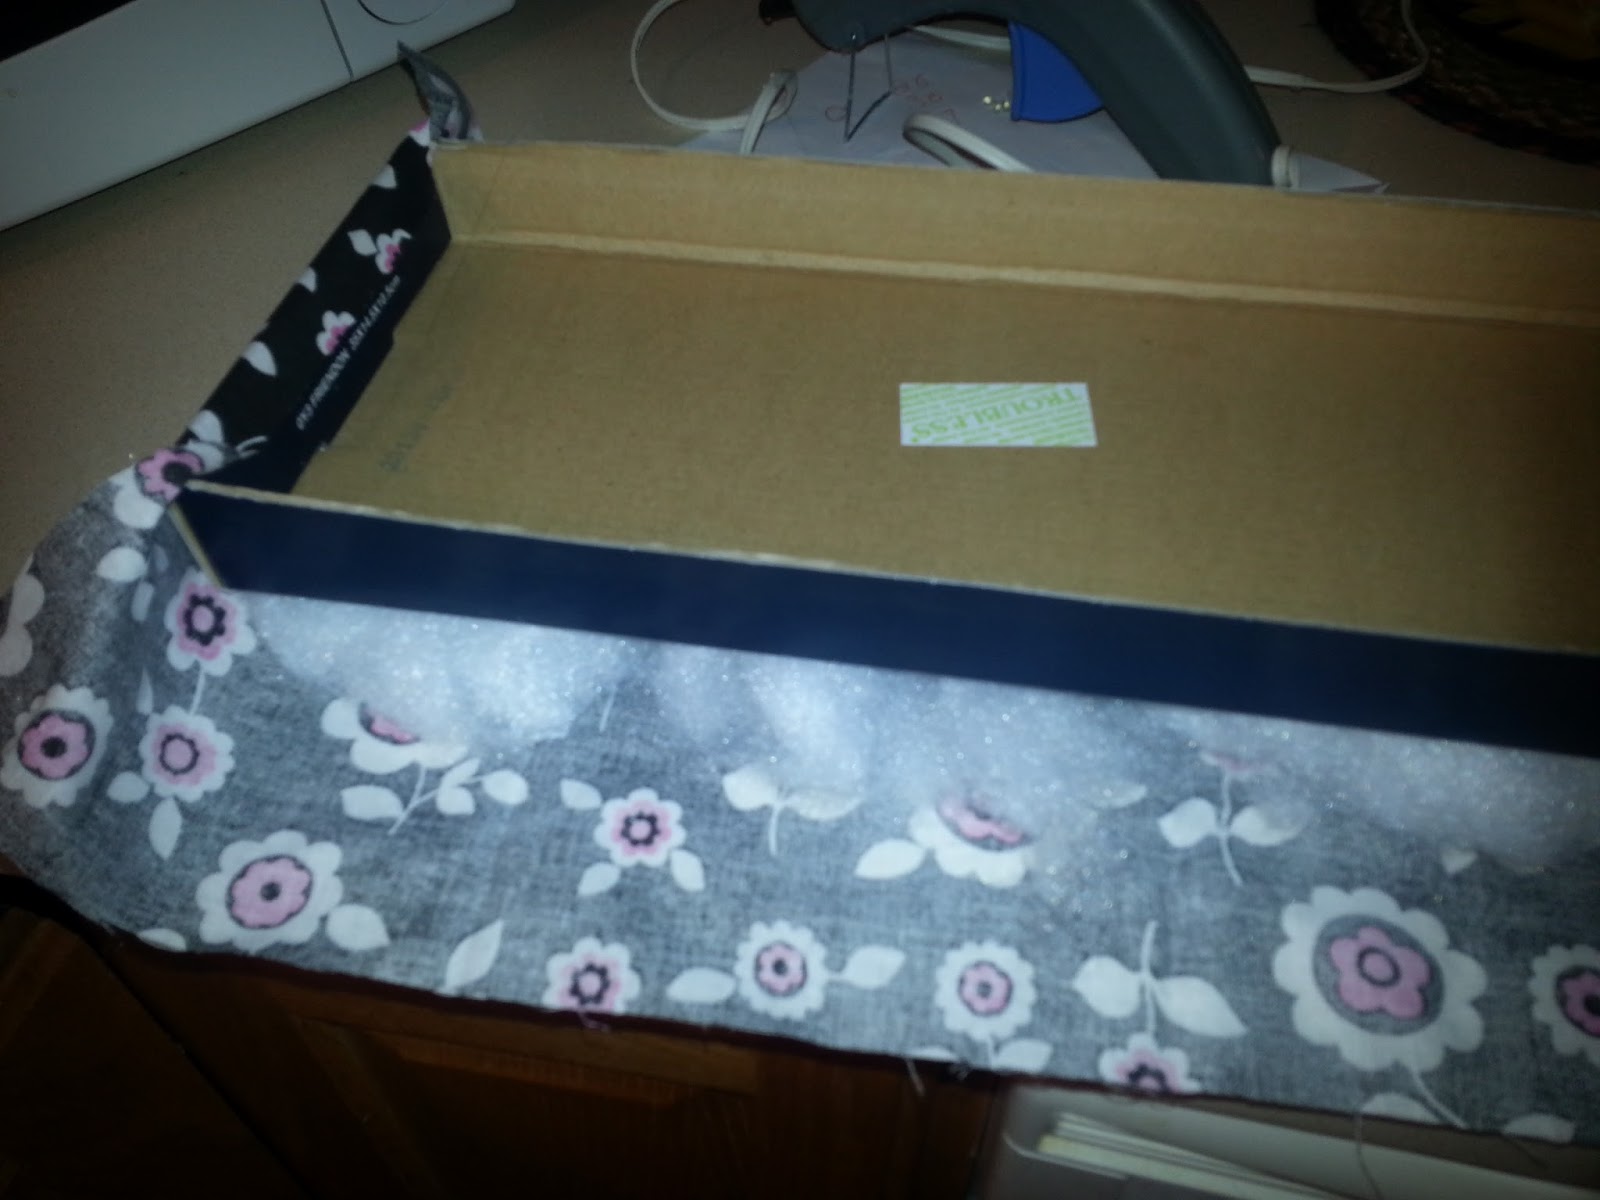
I used an old shoe box, 4 pencils, printed duck tape, a little fabric, and hot glue


first, wrap the pencils in tape, these are the bed posts


I had these nifty shaped wood pieces, but you could cut the shape from cardboard.
they will be headboard and footboard. Wrap them in the tape also.
At this point i trimmed the bottom of the shoe box to be thin enough as a mattress.


use hot glue to attatch fabric around the shoe box top.  It was a bit hard and flat looking so i stuck some fluff in there ;)


wrap duck tape around the top portion of the bottom of the box


top should still slide over bottom


glue headboard, footboard and posts in place


finish by wrapping the ducktape around the entirety at the bottom

Viola! A beautiful barbie bed!!


The Living Room!

Barbie needed a sectional, and the box and ducktape worked so well on the bed, that I decided to re-do that here.

printed duck tape, spaghetti boxes, fabric, cardboard and hot glue used.

i cut the boxes to the size needed 


I stuffed them with old plastic bags so they wouldnt crush and hot glued them together.
This is the couch base.


Next I completely and smoothly glued fabric to a piece of cardboard to be the back of the couch.


Next, I covered the top of the couch with ducktape and glued the backing on


Then like the bed, I wrapped the tape around the entire bottom (including hte back side)


This is what the bottom looked like, I chose not to finish covering it. lazy me


for cushion, i cut cardboard to fit right ontop the couch, and covered it with fabric. I had glued some cotton balls on the top of it for fluff. (the bottom is shown here)


I put hot glue all over that bottom there, and glued it to the couch then sewed tiny pillow shapes for the top and glued them on too.


it looked great, but i had these little wooden pieces that i thought looked like legs, so i added them just for looks


just hot glued them right on!


Barbie loves it! lol


Accessories! A Rug!!

Only duck tape, and shelf liner

I have this liner in all my shelves, so i just stole a piece lol.
cut it to a rug size, and covered it with different colored duck tape.


to make it more professional looking, I wrapped the ends with coordinating solid black duck tape 


works great!


dont have tutorial for the end tables but they are painted wooden candle holders and jar lids glued together.
the lamps are upside down wooden candle cups clued to another random wooden peg i had laying around.

This was a super long post. . . kudos to you if you made it to the bottom.
Thanks for reading :)

Ang