Showing posts with label tutorial. Show all posts

Thursday, January 8, 2015

Diy baby knot hat! Tee shirt upcycle Soo cute!


Its cold outside, and our babies are bald!! lol! lets make some hats!


For starters, I traced an old knot hat i had, but made it a little bigger all around (needed it a size up) but i also found a printable one if you wanted your own at prudentbaby  HERE I really made mine the same way ;)

I started with an old tee shirt, and my pattern.
I missed the photo of step one, but pretty much as you would imagine, i laid the tee flat inside out,  traced my pattern (right on the bottom hem so i could use it) and cut it out/sewed it together, 

 I used my new serger for this, but have made them before with regular stitch followed by a zigzag on the outside to reinforce it. This is what i have now. (see the tee hem at the bottom)


Next step is to fold the bottom up evenly as shown and pin in place


a zig zag stitch is used to sew right along this seam


now turn inside out and press seams flat 


tie knot in top as wanted. you can fold the bottom up again or not, however you like... cute right


we will let the reborn doll model it here lol


you could also embellish them with buttons, flowers, bows, etc.
I made a couple for some friends of mine.  I just hand sewed little Initials on that i cut out of felt. Simple but made them so much more special! 


Thanks for stopping by! Happy Crafting!


Tuesday, February 12, 2013

Diy play birthday cake

DIY Play Cake


I've made several different play foods out of felt for my kiddos to play with, but the one thing they needed most was a cake. They are always throwing birthday parties for each other and what not, and I wanted to make one for them.  

I made one myself out of only felt. . . well. . . it didnt hold shape, so as i looked online for how to fix it (and i did, ill post it later hopefully) I found this tutorial here at she wears flowers for one using a hat box. I loved the idea of one with storage for decorations, but didnt have a hat box, or the metal for the outside of it, but to my surprise while searching my craft pile, i found this old cookie tin and thought YES same idea, minus having to cut metal!!


The idea:  wrap the tin in felt to look like a cake, make felt decorations that can store inside it, add magnets to the decorations and they stick on the cake. . . awesome, right!!

First, cover the cake! I wanted it to be chocolate, so  found a nice brown and cut a strip (or two) the same width as the depth of the tin, sewed them together to the right circumference (to fit snug) 


Next, turn this brown circle inside right, and slip over the tin.
Important:  The tin needs to close, so make sure you leave the space at the top that the lids comes down to uncovered.  Extra will hang over bottom.


Wrap that extra around the bottom and hot glue it in place


Next cut a circle a bit bigger than the lid, and hot glue it on so it touches the rim 


mine was a little short but thats ok, im adding a ruffle 


 I saw instructions for making the felt ruffle HERE (she wears flowers)

after making the ruffle, (well several sewed together long enough to go around) I glued it on the rim of the lid like so:
I made sure it hung over a little that way it would cover up any gap i may have had in the felt
see how cute!! 


 I liked the ruffle so much i decided to make another for the bottom of the cake too, to more resemble the piped decorative icing on a real cake.


Bottom and top of cake 


And then what the kids loved best. . . the decorations!!

For the candles theres a better turorial here.
I just cut the little flame shapes out of red and yellow felt and glued them together with hot glue, then took a 2" square and rolled it up, glued the end to together, glued flame atop, and a round magnet on bottom :)


felt sticks to felt, so i cut random shapes out for them to stick on the cake


i made theses flowers of felt and glued a magnet on bottom


see, here is a cute cake to have with tea, 


and here is a birthday cake for all their parties!!


 and what i like best. . . all decorations store inside !!


Saturday, January 26, 2013

Diy party lights tutorial

A how to for some party lights. . . whatever color or pattern you wish!!


You will need:
String of christmas lights
mini plastic cups 
spray glue
Fabric (to cover cups)
paper (for cup pattern)
small knife or other tool to cut cup top


First:  trace the cup the best you can onto paper
It should look something like this:

cut it out, and wrap it around the cup and trim it as needed till you get a fit
this is your pattern

next, cut an x in the top of each cup you will be using ie: number of lights on strand.
(i only wanted a small strand but only had a large strand so i folded mine in half and put 2 lights in each hole)

Next:  cut out pieces of fabric using your pattern to cover each cup
cover an area well (spray glue is messy!)
spray the cup (or back of fabric) and wrap it on the cup smoothly

then finally push the light thru the hole (or if you are like me, 2 lights)


Then voila!! your finished!
NOTE: i didnt want to buy anything and used what i had at home, soooo, WHITE wire lights would look much better :)


They look so cute on!


Tuesday, January 22, 2013

Fast Easy Valentines Day Hair

A Valentines Day Hair-doo!!
This is cute in pigtails too, but my little one has really thin fine hair, so, one it is :)

To do this, i made a simple ponytail, rather high on the head, loosened it, and made an upside-down topsy tail.  Then, just split the topsy tail in two equal strands and fold them down into a heart shape and secure it with a cute little hairbow. 

Took just a couple minutes all together!!


Friday, January 18, 2013

Old Top Repurposed!!


So, I had this cute short sleeve sweater. . . Which is much too tight.  This is why in the pic I chose to hold it up to me, rather than try it on. LoL.


Using my creative mind, I decided to repurpose it!! Meaning, I decided to transform it from an old ill fitting sweater, into a cute girls sweater dress.

First (no pic of this sorry), I put it over my girl, and pinched the sides together to get an idea of how much smaller it need to be.  I pinched up a bit more than an inch on either side.


I laid the dress flat, inside out and sewed a seam down each arm as shown below (about
 same as I had pinched together on her earlier)


Make sure if you do this that you round out the underarm, and cut the excess off as close to the seam under the arm as possible, so it lays right when turned back inside right.


Once sewn down both sides, trim excess close to seam, and turn inside right.


It was a hit! She loved the dress!


Monday, January 7, 2013

DIY fold down waist Maxi Skirt

Here it is!! The comfy stretchy maxi skirt, with fold over waist. . . and you can make it yourself!! This one took me maybe an hour ;)


First, select your material! I got i think 2 yards of this mustard yellow stretch jersey material at a local walmart on clearance (love clearance).  Next, pick an existing skirt that fits you well, fold fabric in half with right sides together (good printed sides in, underside out), and lay your skirt on top of material.


Pin it right to the material (or at least thats what it did to keep it from moving, this jersey was tricky).  When it comes to the waist band, fold it down and pin it so you are pinning just the shape of the skirt.


should look like this:


Cut around the skirt (careful not to cut your good skirt) close to the hem (leaving it undone, i like the way jersey hems roll) and leave about an inch or half an inch on the sides and around waistband for seam allowance.


 leave it pinned to help hold together, and carefully sew down both sides. then unpin


 Now for the waistband
Measure your waist. . . add one inch to this. . . then cut that # in half
ie mine was 30 (dont tell please lol) i added 1, making it 31, then cut this in half = 15.5"


fold material in half right sides together again, and cut a rectangle about 10 inches tall x (your measurment) wide.


pin 10 inch side together, and sew down it


turn inside right, and you have a tall circle of fabric

pinch the middle of the cylinder, and fold there, once whole circle is folded in half down middle, you should have a shorter circle, with all seams on the inside :)  This is your waist band.


with skirt still inside out, pin waistband to the skirt, right sides together, start by pinning sides and middle together (skirt should be a bit bigger than waistband and will look gathered)


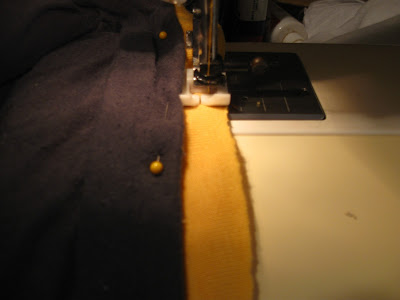
sew together carefully, slightly stretching waistband to match skirt as needed.
then turn inside right, and voila!!


your own maxi skirt!!


i had enough mateial left to cut a long rectangle about 10" wide or so to make a matching scarf. . . completes the look i think!


Hope you try it and it turns out as comfy as mine!!!
Happy Crafting