Showing posts with label girls. Show all posts

Thursday, January 8, 2015

Upcycle! Diy girls skirt from old hoodie!


I love to upcycle! Partly because I'm a creative spirit, and love to make things, and then also because I have a problem throwing anything away.

I had this Cabela's hoodie which I loved. It had barely been worn when I got wood glue (which never would come out despite all my pinterest stain removal efforts) all over the sleeve. I kept it for over a year (because I cant throw things away, remember). Whilst making an effort to get rid of some old winter wear I drug it back out, and came up with this cute idea... a skirt for my big girl!

I started simply with the sweat shirt

(notice i already started chopping then thought... may want pics of this) 

Then i cut the bottom off
 (I left alot above pocket for it to be approx knee length, would look even cuter, shorter)

I also cut the string part of the hood off, with about 1.5" of fabric in tact to be the waist band ( you may have to use something else, but this fit my girl perfect... and its an instant drawstring if it were too big.


 I turned the skirt part inside out and marked an inch or so wider than the waist of a nice fitting skirt on either side, and sewed in a straight line (or straight as I could) from that mark to the hem band on either side.


I sewed the hoodie string part into a circle right sides together to finish the waistband,


and marked the middle and both sides of it, and the skirt body with pins and pinned them both together, right sides together.


I then sewed these two pieces together (I used my new serger. eekkk!! best gift ever) stretching them out as I went so they were the same size.


Then just turned inside right, and ironed the seams down....Voila!!


  Adorable with tights, and my girl said its super comfy! Win win!


Saturday, January 26, 2013

Diy party lights tutorial

A how to for some party lights. . . whatever color or pattern you wish!!


You will need:
String of christmas lights
mini plastic cups 
spray glue
Fabric (to cover cups)
paper (for cup pattern)
small knife or other tool to cut cup top


First:  trace the cup the best you can onto paper
It should look something like this:

cut it out, and wrap it around the cup and trim it as needed till you get a fit
this is your pattern

next, cut an x in the top of each cup you will be using ie: number of lights on strand.
(i only wanted a small strand but only had a large strand so i folded mine in half and put 2 lights in each hole)

Next:  cut out pieces of fabric using your pattern to cover each cup
cover an area well (spray glue is messy!)
spray the cup (or back of fabric) and wrap it on the cup smoothly

then finally push the light thru the hole (or if you are like me, 2 lights)


Then voila!! your finished!
NOTE: i didnt want to buy anything and used what i had at home, soooo, WHITE wire lights would look much better :)


They look so cute on!


Tuesday, January 22, 2013

Fast Easy Valentines Day Hair

A Valentines Day Hair-doo!!
This is cute in pigtails too, but my little one has really thin fine hair, so, one it is :)

To do this, i made a simple ponytail, rather high on the head, loosened it, and made an upside-down topsy tail.  Then, just split the topsy tail in two equal strands and fold them down into a heart shape and secure it with a cute little hairbow. 

Took just a couple minutes all together!!


Friday, January 18, 2013

Old Top Repurposed!!


So, I had this cute short sleeve sweater. . . Which is much too tight.  This is why in the pic I chose to hold it up to me, rather than try it on. LoL.


Using my creative mind, I decided to repurpose it!! Meaning, I decided to transform it from an old ill fitting sweater, into a cute girls sweater dress.

First (no pic of this sorry), I put it over my girl, and pinched the sides together to get an idea of how much smaller it need to be.  I pinched up a bit more than an inch on either side.


I laid the dress flat, inside out and sewed a seam down each arm as shown below (about
 same as I had pinched together on her earlier)


Make sure if you do this that you round out the underarm, and cut the excess off as close to the seam under the arm as possible, so it lays right when turned back inside right.


Once sewn down both sides, trim excess close to seam, and turn inside right.


It was a hit! She loved the dress!


Monday, March 5, 2012

Ruffle Tee Tutorial!!!!!


First off the tutorial for the skirt is in my previous post, and the matching brother tee i will explain later.
Find a tee shirt to match your fabric, and measure around the neck from shoulder seam to shoulder seam.  Multiply this by 2.5 : this is your ribbon length. Width depends on you, mine is 6".
example:  My neckline was 11", so i cut a fabric rectangle 27.5" x 6"


here is my strip we will make ribbon out of


the son was working hard while i was sewing LOL


fold the strip in half right sides together and sew long ways making a long tube
after sewn, using a safety pin, turn inside right


will look something like this


press flat with seam hidden on back side


fold in half again and press again (just to make a crease in center)


unfold and stitch down center line as loosley as possible on sewing machine (or hand stitch: running stitch)


leave plenty of extra thread hanging off 


gently pull thread to gather up your ribbon


continue to gather until it is the size of the neck band


lay in place and evenly distribute ruffles


fold over raw edges and pin them to fabric just covering the shoulder seams


Pin evenly all around neckband


Sew straight down center over existing seam, and down both ends and your are finished!!  Simple huh!


Adorable Bubble Skirt Tutorial!!


First off i want to apologize if you cannot follow me at all. . . I understand that I am horrible at explaining, and not good at taking pics either,(also some are sideways)  but I made my own pattern as I went and it turned out lovely so I wanted to share.  Just use your little girls measurements, no pattern required.
I also made the top and matching brother tee pictured above and will post tutorials on them in the following week.

You Need:
1/2 to 3/4 yd main fabric
1/2 yd lining fabric
elastic (cut to measure of waist)
thread

You will be cutting 3 main pieces:  a waist band, skirt bottom, and skirt lining
Measure 3 measurements:  waist size (where u want skirt sitting),  fullest hip size, and length you want skirt.

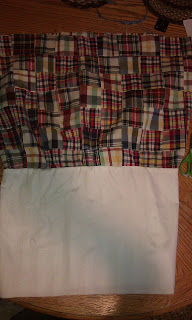
*Cut the Main skirt piece out of main material, its just a big rectangle like so:
 (hip measurment x2= length. . . . and length you actually want finished skirt to be minus 1"=height)
example: my daughters hips were 25" and i wanted it to be 18"long so i cut a rectangle 50"x17"

*Cut the skirt lining as follows:
 (hip measurement x1.5=length. . . and main skirt pieces length minus 4"=height)
example: hips are 25" length will be 37.5" and skirt is cut 17", so height will be 13"

*Cut waistband 6" high, by hip measurement plus 1" (for seam allowance)


Next, fold all 3 pieces over one at a time with the right sides together and sew the back seams on each, then press them out flat.


Take the bottom hem of the main skirt piece and sew a loose running stitch around it. I used embroidery floss, but doubled up regular thread can be used. 


Pull the thread tight little by little to gather the bottom up


this is what mine looked gathered all up, dont tie threads off yet, mine was gathered too much.


Place skirt lining over gathered skirt bottom, right sides together and finish gathering/loosening skirt bottom until it is same width as lining, then pin them together, making sure to match up your seams.


pic of pinned


Sew skirt bottom to lining, removing pins as you go


when finished turn inside right


then fold lining into skirt bottom till both top seams are flush


should look something like this. . . you can see bubble bottom taking place


do the same thing to the top of  the main skirt piece as bottom, (loose running stitch, then gather) match it to the lining top as you did on bottom, pin them together, then make another running stitch with both together and gather them both up.


gather them up to the same size as the waist band


place waist band over skirt, right sides together, and pin gathered skirt to waistband


sew skirt to waistband


turn inside right


fold down top a little bit (maybe 1/4") and press


Fold down again big enough to house your elastic and press again


sew around all the way, except leave a small opening for elastic to go through


use a safety pin to thread elastic through opening


when you are finished pin the two ends of the elastic together and sew them


i usually do two or more zigzag stitches


sew the gap back up. . . if you have a tag, you can place it in the hole before you sew it like i did


finished skirt!