Monday, March 5, 2012

Ruffle Tee Tutorial!!!!!


First off the tutorial for the skirt is in my previous post, and the matching brother tee i will explain later.
Find a tee shirt to match your fabric, and measure around the neck from shoulder seam to shoulder seam.  Multiply this by 2.5 : this is your ribbon length. Width depends on you, mine is 6".
example:  My neckline was 11", so i cut a fabric rectangle 27.5" x 6"


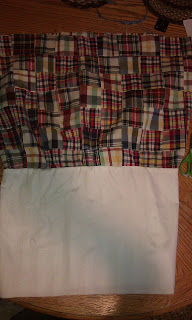
here is my strip we will make ribbon out of


the son was working hard while i was sewing LOL


fold the strip in half right sides together and sew long ways making a long tube
after sewn, using a safety pin, turn inside right


will look something like this


press flat with seam hidden on back side


fold in half again and press again (just to make a crease in center)


unfold and stitch down center line as loosley as possible on sewing machine (or hand stitch: running stitch)


leave plenty of extra thread hanging off 


gently pull thread to gather up your ribbon


continue to gather until it is the size of the neck band


lay in place and evenly distribute ruffles


fold over raw edges and pin them to fabric just covering the shoulder seams


Pin evenly all around neckband


Sew straight down center over existing seam, and down both ends and your are finished!!  Simple huh!


Adorable Bubble Skirt Tutorial!!


First off i want to apologize if you cannot follow me at all. . . I understand that I am horrible at explaining, and not good at taking pics either,(also some are sideways)  but I made my own pattern as I went and it turned out lovely so I wanted to share.  Just use your little girls measurements, no pattern required.
I also made the top and matching brother tee pictured above and will post tutorials on them in the following week.

You Need:
1/2 to 3/4 yd main fabric
1/2 yd lining fabric
elastic (cut to measure of waist)
thread

You will be cutting 3 main pieces:  a waist band, skirt bottom, and skirt lining
Measure 3 measurements:  waist size (where u want skirt sitting),  fullest hip size, and length you want skirt.

*Cut the Main skirt piece out of main material, its just a big rectangle like so:
 (hip measurment x2= length. . . . and length you actually want finished skirt to be minus 1"=height)
example: my daughters hips were 25" and i wanted it to be 18"long so i cut a rectangle 50"x17"

*Cut the skirt lining as follows:
 (hip measurement x1.5=length. . . and main skirt pieces length minus 4"=height)
example: hips are 25" length will be 37.5" and skirt is cut 17", so height will be 13"

*Cut waistband 6" high, by hip measurement plus 1" (for seam allowance)


Next, fold all 3 pieces over one at a time with the right sides together and sew the back seams on each, then press them out flat.


Take the bottom hem of the main skirt piece and sew a loose running stitch around it. I used embroidery floss, but doubled up regular thread can be used. 


Pull the thread tight little by little to gather the bottom up


this is what mine looked gathered all up, dont tie threads off yet, mine was gathered too much.


Place skirt lining over gathered skirt bottom, right sides together and finish gathering/loosening skirt bottom until it is same width as lining, then pin them together, making sure to match up your seams.


pic of pinned


Sew skirt bottom to lining, removing pins as you go


when finished turn inside right


then fold lining into skirt bottom till both top seams are flush


should look something like this. . . you can see bubble bottom taking place


do the same thing to the top of  the main skirt piece as bottom, (loose running stitch, then gather) match it to the lining top as you did on bottom, pin them together, then make another running stitch with both together and gather them both up.


gather them up to the same size as the waist band


place waist band over skirt, right sides together, and pin gathered skirt to waistband


sew skirt to waistband


turn inside right


fold down top a little bit (maybe 1/4") and press


Fold down again big enough to house your elastic and press again


sew around all the way, except leave a small opening for elastic to go through


use a safety pin to thread elastic through opening


when you are finished pin the two ends of the elastic together and sew them


i usually do two or more zigzag stitches


sew the gap back up. . . if you have a tag, you can place it in the hole before you sew it like i did


finished skirt!


Friday, August 12, 2011

Very Past Due Post!! Opened my first Store!!

Since last fall when we (my sister-in-law, mother-in-law, and myself) began readying to open shop, ive been VERY busy.  Building, Planning, Crafting etc.  We built on land right on mainstreet in town that my father-in-law owned for years and never used.  I stenciled the little sign that we placed on the property :)
It looked really rough at first. . . but our family and friends chipped in and with so many helping hands it went up fast! Even us ladies helped stand the walls and everything else!

Although small. . . our shop has the perfect mountain backdrop. . .
I dont know what happened to the finished picture of the store when it first opened, but we opened our doors on October 6th, 2010 (3 days before my birthday!!!) This picture was taken around christmas. . . we had some awesome snow and some dangerous ice cycles on our handicap ramp!!

So thats it! After years of craft shows and selling on ebay i finally got 2 partners in crime (my awesome inlaws!!) to craft with, and after a while of us selling online and craft shows galore we finally did it. . . and the best part is that we built a playroom in the back. . . so when i do work my kids go with me (so even on the couple days a week i work the store im still a stay at home mom!) And i moved right across the street ;)

Heres a glimps of the inside of our little shop. . . we build all the solid wood furniture ourselves, stitch the stitcheries (well most of them) and stencil signs etc. I hope to post alot more soon, like how toos and my own techniques for crafting! thanks so much for letting me share with you all!!

Have a blessed and safe weekend!

My Moms Blog :)

My mom started a blog, Suds and Stitches and if you like crafting, or homemade goodies im sure its one you will enjoy!  She makes old fashioned cold process lye soap, cans about anything, sews, stitches, builds. .  . you name it, she does it! lol! Growing up around the miss-do-it-herself is no doubt what gave me such the avid love for crafting. . .  anyway, stop by and check her out!


Have a blessed weekend!

Tuesday, July 6, 2010

Finished my fireplace and keyboard table!

So i dont know if you remember, but when i moved in a few months ago, my living room looked kinda like this:


Well i knew the only thing i could do to make that brick nice was cover it. . . so this is what i came up with, to keep it affordable, i framed it up with plywood and pine board.


so now my living room looks like this: and its not finished yet, i just cant seem to get things to where i like them, lol!


And about the keyboard, i cant afford a piano, but i like to play, so i got a keyboard, which really really clashes with the prim style, lol, soooo i wanted to build a little table/cabinet thingy to house it, and this is what i came up with, and yea, i built this my self. . . im kinda proud:

the front is hinged and folds down so i can pull it out. . . oh yea, i painted that little floor cloth too! dont laugh its my first try at one, lol and i made the stensil myself so it wasnt completely clean.

so, anyway, this is all what i have been working on, and i have other things im working on now, so, here in another month or so when i get done lol, i take sooo long, lol, i'll post some more! Hope everyone had an awesome fourth!!