Showing posts with label fold. Show all posts

Monday, January 7, 2013

DIY fold down waist Maxi Skirt

Here it is!! The comfy stretchy maxi skirt, with fold over waist. . . and you can make it yourself!! This one took me maybe an hour ;)


First, select your material! I got i think 2 yards of this mustard yellow stretch jersey material at a local walmart on clearance (love clearance).  Next, pick an existing skirt that fits you well, fold fabric in half with right sides together (good printed sides in, underside out), and lay your skirt on top of material.


Pin it right to the material (or at least thats what it did to keep it from moving, this jersey was tricky).  When it comes to the waist band, fold it down and pin it so you are pinning just the shape of the skirt.


should look like this:


Cut around the skirt (careful not to cut your good skirt) close to the hem (leaving it undone, i like the way jersey hems roll) and leave about an inch or half an inch on the sides and around waistband for seam allowance.


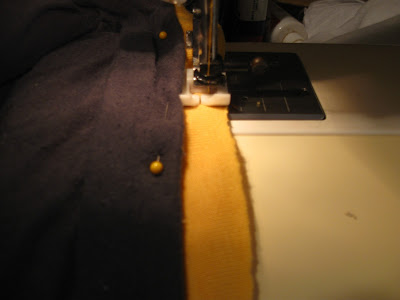
 leave it pinned to help hold together, and carefully sew down both sides. then unpin


 Now for the waistband
Measure your waist. . . add one inch to this. . . then cut that # in half
ie mine was 30 (dont tell please lol) i added 1, making it 31, then cut this in half = 15.5"


fold material in half right sides together again, and cut a rectangle about 10 inches tall x (your measurment) wide.


pin 10 inch side together, and sew down it


turn inside right, and you have a tall circle of fabric

pinch the middle of the cylinder, and fold there, once whole circle is folded in half down middle, you should have a shorter circle, with all seams on the inside :)  This is your waist band.


with skirt still inside out, pin waistband to the skirt, right sides together, start by pinning sides and middle together (skirt should be a bit bigger than waistband and will look gathered)


sew together carefully, slightly stretching waistband to match skirt as needed.
then turn inside right, and voila!!


your own maxi skirt!!


i had enough mateial left to cut a long rectangle about 10" wide or so to make a matching scarf. . . completes the look i think!


Hope you try it and it turns out as comfy as mine!!!
Happy Crafting


Saturday, December 29, 2012

DIY play food. . . felt food for our play kitchen!

Well the play kitchen is complete, and we needed some cute accessories to go in it.
Looking online i fell in love with felt food, mostly because it is hand made and cheap, and also because it looks real and is washable.

This is a list of the felt food (and accessories for the kitchen) that i have made.
My daughter LOVES them, when I handed her the green beans this morning she told me in her excited squeely girly voice (and i quote) "oh mom!, you can make any food look real!"

strawberries (tutorial here)


Fried Eggs


Bread


Strawberry Jam


I mixed craft paint and purple glitter and painted inside of smallest (clean dry) jam jar, to look like strawberry jam. . . I also cut out glops of "jam" from matching colored felt, that we keep inside the jar.
(i know. . . its glass. . . but she is 7, no, i wouldn't recommend keeping glass jars for toddlers ;))


the sandwich fixins to go with the bread.


yum!


her cookie jar


chocolate chip cookies


cheap shaker set (again glass) filled with old salt and old coffee grounds, cap filled with hot glue, then glued on. . . she can shake all she wants and nothing comes out!


my personal favoite:  Donuts
one each strawberry, chocolate and vanilla glaze


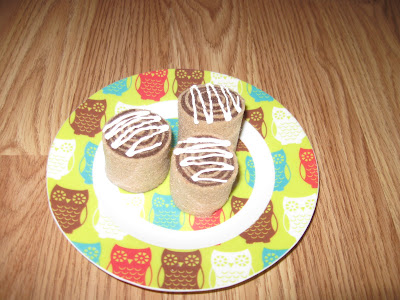
mini cinnamon rolls  (rolled up felt in tan and brown with white fabric paint (puff paint) on top)


Popsicles in the freezer 


I have kept all these for her, washed them well, and gave them to her.
All are miniature versions of the same we keep in our fridge at all times! lol

orange juice and mayo have been painted inside to look real


a cake with 4 slices (really hard to make without a pattern as i did, i recommend downloading a pattern)

i stuffed this like normal and it was bulky. . . so i had to add cardboard inside to keep its shape


 And last but not least. . . the green beans

i used a mini can of green beans (i have the fancy can opener that cuts under the edge so once cut open nothing is sharp:)


rolled up rectangles of green felt for the green beans and placed inside can


more tutorials to come!!! check back to see how i made a pretend play birthday cake they can decorate over and over!!

Thanks for stopping by!