Friday, August 23, 2013

DIY Barbie Doll House


DIY Barbie House!
This is the dollhouse I made for my daughter. It had to be slim to fit in her room.

I used all 1x10 shelving board, and luan for backing it
I simply cut out wood pieces like a shelf, and angled the top like a roof.
I didnt take many pics of this, by the time I thought to take the first pic, i had all pieces together and the roof painted black already lol.


Here it is with the backing cut and nailed on


I painted it flat white first for primer, then painted each room


for flooring, I found wood look contact paper at the dollar store, just cut to size and stick down!!
So pretty!!! She was thrilled!


and here is a quick glimpse into each room (except top, its just storage for now)


The bedroom. I made the bead, its in my previous post. The picture is a small craft frame with a picture of barbie i printed.


Bathroom


Living room 


Ariel watching spongebob lol


the kitchen (this was a repaint to match the table she had)

here is the before pic

Rapunzel fixing her man some tea, lol


Monday, August 12, 2013

DIY Barbie Doll Furniture


Barbie!


My little girl is really into Barbie right now. She is 7 and has had barbies for years but is just now really into playing with them.  She wanted a doll house (as any girl would) and I was unable to find an affordable one which would fit in her tiny room where it needed to be, so I made one. 

The doll house I made was perfect for her, but now we needed furniture. After seeing the prices of furniture sets in toy stores I knew I had to use my craftiness on it!  I made some things from scratch, and re-purposed some existing items. Below is what ive been working on. . . hope it helps you if you too are looking for cheap doll furniture! :)

Bedroom:

Dresser 
Note: (i realize these pics are sideways and am not tech savy enough to fix sorry)
We had a dresser in a not so hip pink, so we spray painted it black.


i put tape around the knobs so they wouldn't get painted, and sprayed away!


For the mirror, I found a tiny mirror out of an old purse and used painted popsicle sticks as a frame.  I hot glued the mirror to a square of cardboard (old cereal box lol) and then hot glued the frame around it. (I cut the angles on the sticks with good scissors)


Here is the newly painted dresser and mirror!


Now for a bed!  

I saw the idea for this bed online on another blog. I cannot find it anymore but when I do I will post the link for proper credits. They did awesome and I copy-catted it :)

I used an old shoe box, 4 pencils, printed duck tape, a little fabric, and hot glue


first, wrap the pencils in tape, these are the bed posts


I had these nifty shaped wood pieces, but you could cut the shape from cardboard.
they will be headboard and footboard. Wrap them in the tape also.
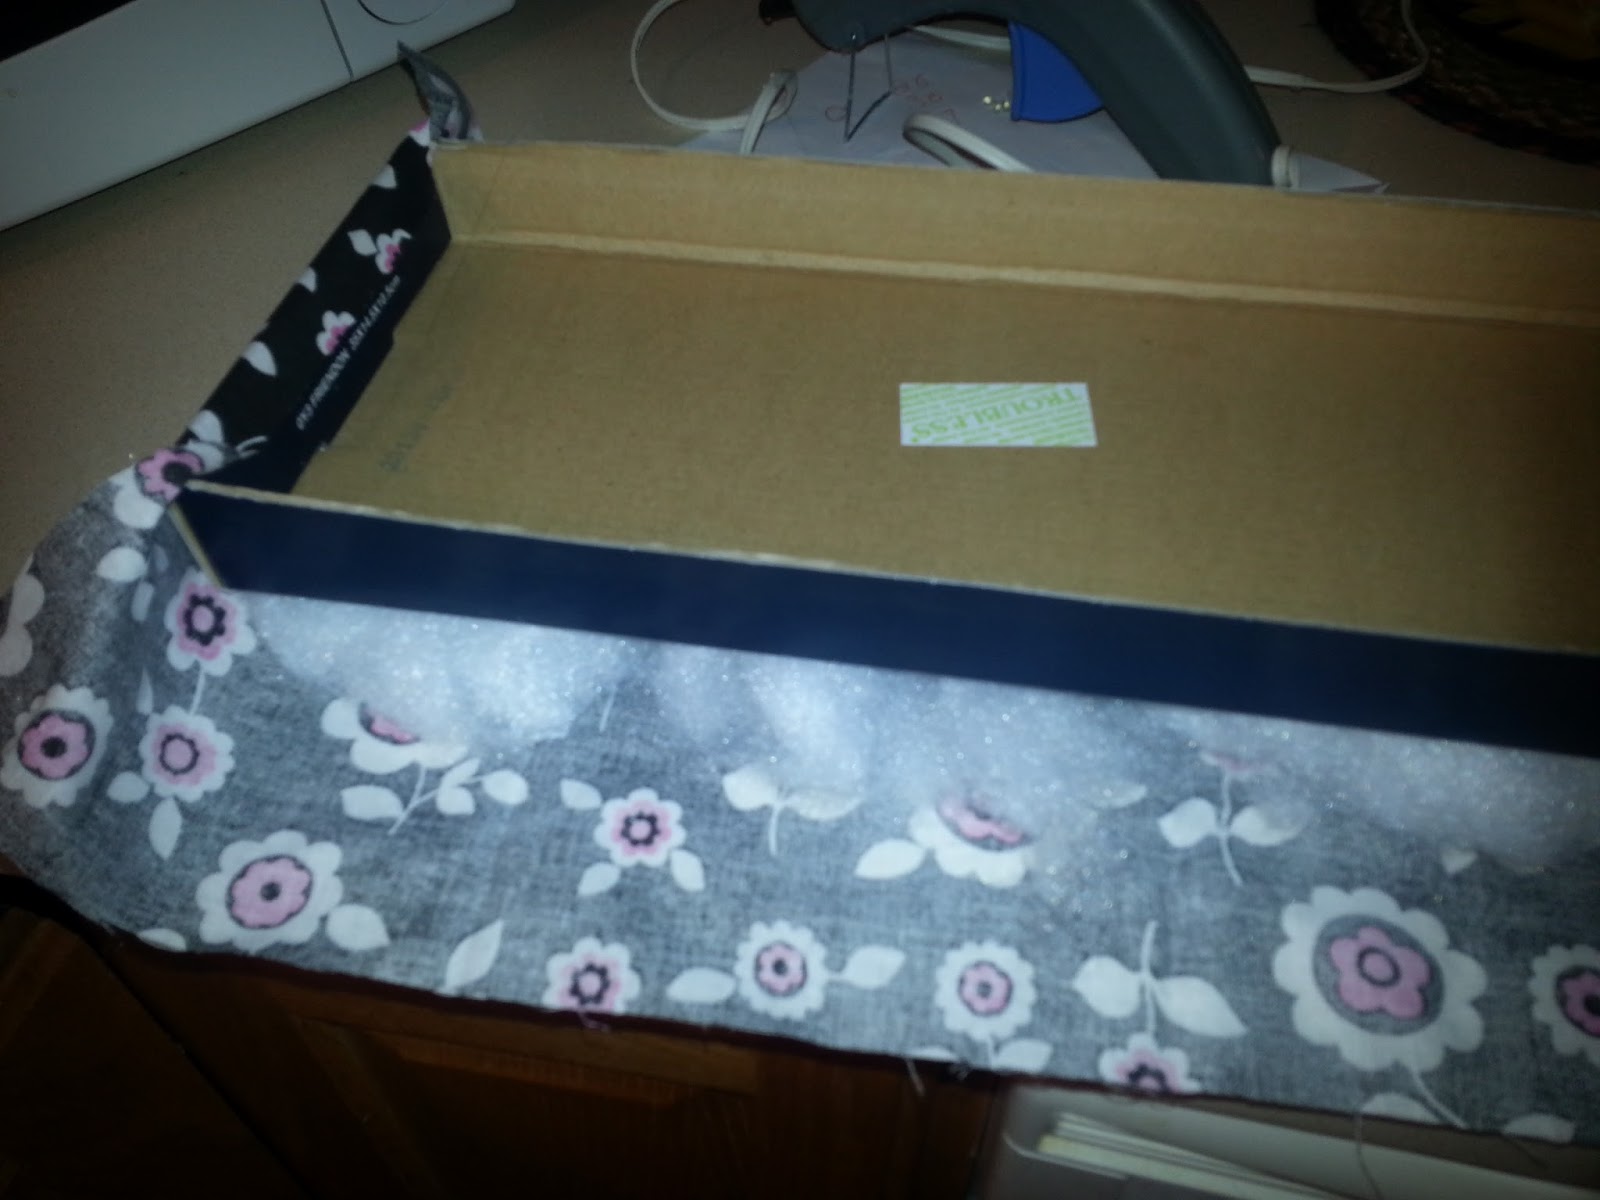
At this point i trimmed the bottom of the shoe box to be thin enough as a mattress.


use hot glue to attatch fabric around the shoe box top.  It was a bit hard and flat looking so i stuck some fluff in there ;)


wrap duck tape around the top portion of the bottom of the box


top should still slide over bottom


glue headboard, footboard and posts in place


finish by wrapping the ducktape around the entirety at the bottom

Viola! A beautiful barbie bed!!


The Living Room!

Barbie needed a sectional, and the box and ducktape worked so well on the bed, that I decided to re-do that here.

printed duck tape, spaghetti boxes, fabric, cardboard and hot glue used.

i cut the boxes to the size needed 


I stuffed them with old plastic bags so they wouldnt crush and hot glued them together.
This is the couch base.


Next I completely and smoothly glued fabric to a piece of cardboard to be the back of the couch.


Next, I covered the top of the couch with ducktape and glued the backing on


Then like the bed, I wrapped the tape around the entire bottom (including hte back side)


This is what the bottom looked like, I chose not to finish covering it. lazy me


for cushion, i cut cardboard to fit right ontop the couch, and covered it with fabric. I had glued some cotton balls on the top of it for fluff. (the bottom is shown here)


I put hot glue all over that bottom there, and glued it to the couch then sewed tiny pillow shapes for the top and glued them on too.


it looked great, but i had these little wooden pieces that i thought looked like legs, so i added them just for looks


just hot glued them right on!


Barbie loves it! lol


Accessories! A Rug!!

Only duck tape, and shelf liner

I have this liner in all my shelves, so i just stole a piece lol.
cut it to a rug size, and covered it with different colored duck tape.


to make it more professional looking, I wrapped the ends with coordinating solid black duck tape 


works great!


dont have tutorial for the end tables but they are painted wooden candle holders and jar lids glued together.
the lamps are upside down wooden candle cups clued to another random wooden peg i had laying around.

This was a super long post. . . kudos to you if you made it to the bottom.
Thanks for reading :)

Ang


Friday, March 15, 2013

DIY Stamp (make your own stamp for clay or playdough) quick and easy way!


Tools I use:  Sculpey Clay,
Piece of random wood (for stamp block),
Sharp tool for stamp design


I have a fancy tool (see above) but prefer my cheap homemade one (above right)


kneed small ball of clay and smash out flat to about 1/2" thick


Using the sharp tool (mine is the pointed end of a large safety pin i snipped off and attatched to an old craft dowel) make the outline of what the stamp will say with dots. It looks best to do it this way rather than drag words out.

Then slowly connect dots, until you have a smooth look.
THEN:
preheat oven to 275 degrees
bake clay mold for about 20 min
(or whatever clay box says)
after baked let it cool completely.

THEN:
make another small ball of clay, flatten it the same way, and push it into the mold you just made!


it should be backwards like this


place the one you just made, word side up in the oven and bake it just like the one before.

After completely cool, hot glue it to the bottom of a piece of wood.
I used an old craft thread spool.


like so


Then you have it. . . your own stamp to use on clay or whatever. . . havent tried it on ink, but may work for that too :)


Tuesday, February 12, 2013

Diy play birthday cake

DIY Play Cake


I've made several different play foods out of felt for my kiddos to play with, but the one thing they needed most was a cake. They are always throwing birthday parties for each other and what not, and I wanted to make one for them.  

I made one myself out of only felt. . . well. . . it didnt hold shape, so as i looked online for how to fix it (and i did, ill post it later hopefully) I found this tutorial here at she wears flowers for one using a hat box. I loved the idea of one with storage for decorations, but didnt have a hat box, or the metal for the outside of it, but to my surprise while searching my craft pile, i found this old cookie tin and thought YES same idea, minus having to cut metal!!


The idea:  wrap the tin in felt to look like a cake, make felt decorations that can store inside it, add magnets to the decorations and they stick on the cake. . . awesome, right!!

First, cover the cake! I wanted it to be chocolate, so  found a nice brown and cut a strip (or two) the same width as the depth of the tin, sewed them together to the right circumference (to fit snug) 


Next, turn this brown circle inside right, and slip over the tin.
Important:  The tin needs to close, so make sure you leave the space at the top that the lids comes down to uncovered.  Extra will hang over bottom.


Wrap that extra around the bottom and hot glue it in place


Next cut a circle a bit bigger than the lid, and hot glue it on so it touches the rim 


mine was a little short but thats ok, im adding a ruffle 


 I saw instructions for making the felt ruffle HERE (she wears flowers)

after making the ruffle, (well several sewed together long enough to go around) I glued it on the rim of the lid like so:
I made sure it hung over a little that way it would cover up any gap i may have had in the felt
see how cute!! 


 I liked the ruffle so much i decided to make another for the bottom of the cake too, to more resemble the piped decorative icing on a real cake.


Bottom and top of cake 


And then what the kids loved best. . . the decorations!!

For the candles theres a better turorial here.
I just cut the little flame shapes out of red and yellow felt and glued them together with hot glue, then took a 2" square and rolled it up, glued the end to together, glued flame atop, and a round magnet on bottom :)


felt sticks to felt, so i cut random shapes out for them to stick on the cake


i made theses flowers of felt and glued a magnet on bottom


see, here is a cute cake to have with tea, 


and here is a birthday cake for all their parties!!


 and what i like best. . . all decorations store inside !!