Saturday, December 29, 2012

DIY play food. . . felt food for our play kitchen!

Well the play kitchen is complete, and we needed some cute accessories to go in it.
Looking online i fell in love with felt food, mostly because it is hand made and cheap, and also because it looks real and is washable.

This is a list of the felt food (and accessories for the kitchen) that i have made.
My daughter LOVES them, when I handed her the green beans this morning she told me in her excited squeely girly voice (and i quote) "oh mom!, you can make any food look real!"

strawberries (tutorial here)
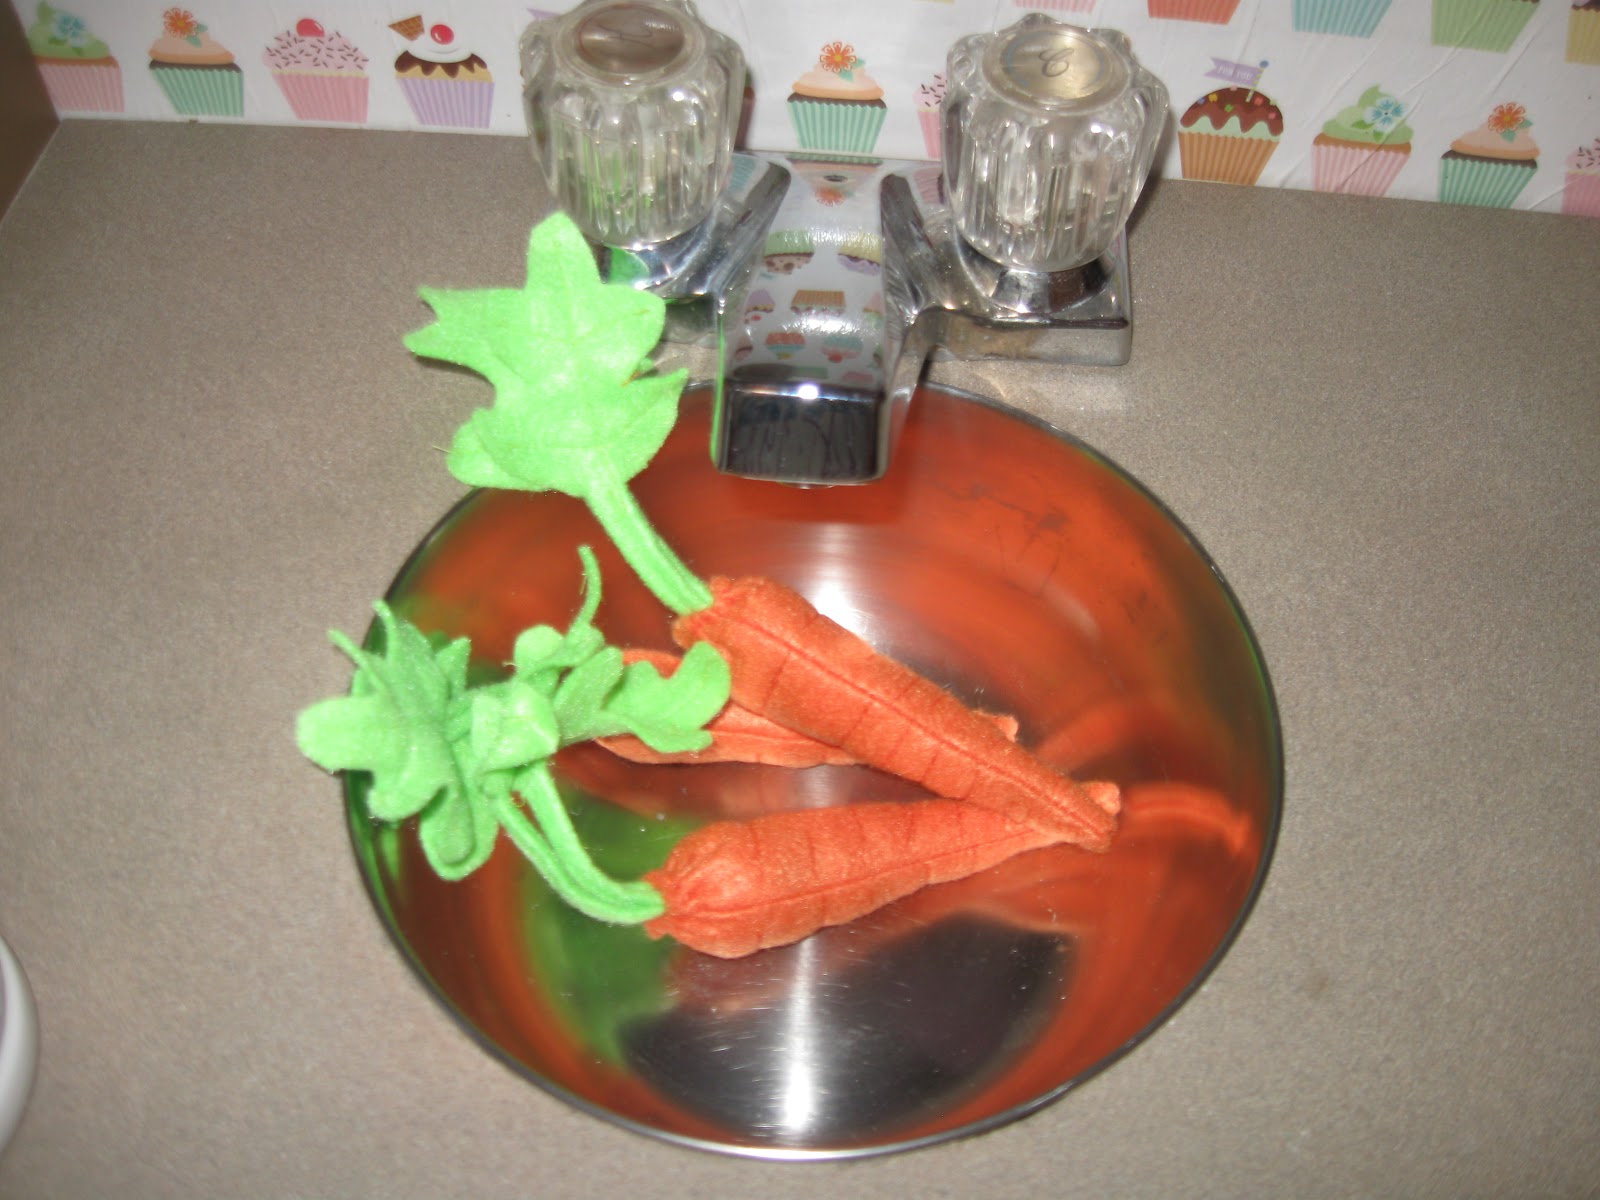


Fried Eggs


Bread


Strawberry Jam


I mixed craft paint and purple glitter and painted inside of smallest (clean dry) jam jar, to look like strawberry jam. . . I also cut out glops of "jam" from matching colored felt, that we keep inside the jar.
(i know. . . its glass. . . but she is 7, no, i wouldn't recommend keeping glass jars for toddlers ;))


the sandwich fixins to go with the bread.


yum!


her cookie jar


chocolate chip cookies


cheap shaker set (again glass) filled with old salt and old coffee grounds, cap filled with hot glue, then glued on. . . she can shake all she wants and nothing comes out!


my personal favoite:  Donuts
one each strawberry, chocolate and vanilla glaze


mini cinnamon rolls  (rolled up felt in tan and brown with white fabric paint (puff paint) on top)


Popsicles in the freezer 


I have kept all these for her, washed them well, and gave them to her.
All are miniature versions of the same we keep in our fridge at all times! lol

orange juice and mayo have been painted inside to look real


a cake with 4 slices (really hard to make without a pattern as i did, i recommend downloading a pattern)

i stuffed this like normal and it was bulky. . . so i had to add cardboard inside to keep its shape


 And last but not least. . . the green beans

i used a mini can of green beans (i have the fancy can opener that cuts under the edge so once cut open nothing is sharp:)


rolled up rectangles of green felt for the green beans and placed inside can


more tutorials to come!!! check back to see how i made a pretend play birthday cake they can decorate over and over!!

Thanks for stopping by!


DIY Felt Food . . . Carrot tutorial

Felt Carrots


Adorably realistic carrots, made of felt.


I drew these patterns out myself on construction paper (as always :) and cut the pieces out of felt.
You can very easily mimic my pattern seen below in yellow :)
one carrot piece and two leaf pieces for each carrot.

Sew lines on the leaves to resemble veins

 Trim the thread

fold stem part over, then over again (like rolled) and sew it up to leaf

my unperfectly perfect leaf :)
repeat for other leaf
 

sew little lines here and there on carrot piece to add real carrot texture
then trim loose threads
 
Next fold right sides together and sew carrot base together


turn carrot inside right. . . you should have these 3 pieces


stuff carrot (i use left over felt pieces diced up)
using embroidery floss, or doubled thread, sew a base stitch around top of carrot.  Do not cut or tie off yet!


Place leaf pieces inside carrott


Pull thread to gather top together


Once pulled very tight, tie it off, then sew back and forth thru the leaves a few times so they can not be pulled out


Repeat for each carrot you wish, and that is that. . . delicious looking carrots!


The DIY Play Kitchen


 The evolution of my play kitchen:
1: inspiration
    My daughter (nearly 7) asked for a kitchen that (and i quote) "I don't have to bend over to play with."
 This my friends, was impossible to find.  Every kitchen set I found in every store was too small. (she is tall)
Thus the need to build one for her. I began looking online to draw inspiration and found nearly exactly what I was dreaming up in my own head at "Britt and her boys".
     I loved her little kitchen and drew several aspects of Cali's from there. I first planned it all out on sketch paper, then got to work.  I scaled mine a bit bigger, and used 1x12 shelving board, all of which i cut out myself with a miter saw and jig saw (so its not perfect lol)


Here is one with the counter top in. I found a metal bowl in my cabinet and traced it onto the counter, then jig-sawed it out :)  The faucet was found in my friends garage :) it was a perfect fit!


I wanted the fridge inside to be white, like most are, and inside oven to be like a real oven, thus all the different paint colors.  I chose a brown base color, for one because I had it left over, so it was free, and also because the pink and brown cupcake paper i wanted to use as the backsplash.


The knobs I cooked up in my brain after a bit of thinking.  I glued a regular old wooden knob onto a baby food jar lid


Turned out a good size, i put it on as normal, but loose, so it wouldn't unscrew when turned.


I painted it with same spray paint i did the metallic doors, and drew on it to look like knobs
The oven display I did just as Britt did with the microwave panel here.  Made it on the computer myself, printed it, and modge podged it on.


Here is the microwave 


Here is finished produce (before extras added)
Used metallic spray paint to resemble stainless steel


The cute cupcake backsplash is actually wrapping paper, i coated a piece of luan with modge podge, glued the paper to it like wall paper, then coated over the top with it, and let it dry good before adding a second coat.


Finally a kitchen big enough for a 7 year old!


She loves it!  (showing off her felt icecream)
I added small white hooks to underside of shelf to hang cups/etc on, and a couple on the side for her aprons and mitts


and what is in the oven? A birthday cake of course!! Wait till i show you how i made it!! :)


Lalaloopsy Themed Birthday


First off:  I don't know how i forgot it till now, but this is my daughters birthday party from March of this year (2012) lol, long long overdue for the blog, but thought some would gain ideas from it :)

My little girl LOVES Lalaloopsy, and I think they are pretty cool myself, so when she asked me if she could have a Lalaloopsy party, I didn't hesitate to say yes.  I do alot of our birthday party decorations myself, but usually go to local party stores for plates, banners, etc.  Now, there are lalaloopsy party decorations all over the place, but at this time, i scoured the internet and found only those on etsy which were a bit to rich for my blood.  So I put my thinking cap on and fired up the printer and sewing maching, and whipped up a lalaloopsy party, homemade style in just a couple days.

She had to have cupcakes. . . so, I found some free Lalaloopsy graphics online, and using microsoft word, made little circles and put the graphics and a few #6's on them.  I printed em out, and cut them out using my scalloped scissors to make em cuter, then did the same to slightly bigger circles of coordinating colored construction paper.


Glue a toothpick in between the graphic and construction paper with cheap school glue and there u have it, cute little lalaloopsy cupcake picks!!


Finished cupcakes, only thing i didnt like was the cute little yellow polkadot wrappers blended with the vanilla cupcakes (shoulda had chocolate :)


For the buttons on the cake I used fruit by the foot and fruit role ups, lol, i didnt have fondant and this worked, I cut out circle shapes with small objects in the kitchen.


very simple cake, the banner on second layer i printed out and cut out, then laminated it (covered both sides with packing tape and cut around edges ;)) and it just stuck on, the topper was one mini lalaloopsy and the handle off of the box of a larger doll. (im not a cake expert. . . never could get icing slick looking)


I used  my 1" circle punch to punch out construction paper "buttons" drew the holes on with black pen


I made a large banner from material and glued printed graphics on it, made the logo from a piece of white posterboard with glued on construction paper letters. . . trees were cardboard painted, taped to wall.


Here are the cupcakes and the cake

The outfit i did make using old material i had left from her bedding set (little missmatched flat sheets LOL)
I made the skirt using a tutorial i found online for a patchwork twirl skirt, and appliqued the shirt using heatbond sheets and the same material.
I simply drew the applique out, and cut each piece out, 

fused heatbond to one side of fabric, traced cutouts on it (mirrored) and ironed on shirt (I also always do a quick zigzag stitch around edges to hold it in place after washing)