Saturday, January 26, 2013

Diy party lights tutorial

A how to for some party lights. . . whatever color or pattern you wish!!


You will need:
String of christmas lights
mini plastic cups 
spray glue
Fabric (to cover cups)
paper (for cup pattern)
small knife or other tool to cut cup top


First:  trace the cup the best you can onto paper
It should look something like this:

cut it out, and wrap it around the cup and trim it as needed till you get a fit
this is your pattern

next, cut an x in the top of each cup you will be using ie: number of lights on strand.
(i only wanted a small strand but only had a large strand so i folded mine in half and put 2 lights in each hole)

Next:  cut out pieces of fabric using your pattern to cover each cup
cover an area well (spray glue is messy!)
spray the cup (or back of fabric) and wrap it on the cup smoothly

then finally push the light thru the hole (or if you are like me, 2 lights)


Then voila!! your finished!
NOTE: i didnt want to buy anything and used what i had at home, soooo, WHITE wire lights would look much better :)


They look so cute on!


Tuesday, January 22, 2013

Fast Easy Valentines Day Hair

A Valentines Day Hair-doo!!
This is cute in pigtails too, but my little one has really thin fine hair, so, one it is :)

To do this, i made a simple ponytail, rather high on the head, loosened it, and made an upside-down topsy tail.  Then, just split the topsy tail in two equal strands and fold them down into a heart shape and secure it with a cute little hairbow. 

Took just a couple minutes all together!!


Friday, January 18, 2013

Valentines Day Card Idea


This was Cali's Valentines Day card last year (kindergarten).  Thinking about doing something similar this year, but undecided. 

I saw a similar one on pinterest, it was taken outdoors. . . this would have looked much better outdoors due to the fact that the hand catches all the flash.

Anywho, to make one, just take a pic of your cutie with their hand to one side in a fist, make sure the fist is made like they are holding something, with thumb towards their body.
Mine looked like this:


Then, to make it look like a card, I added a border, and a Short Valentine Message (make sure its still 4x6 size)


 I printed them (4x6) at my local wal*mart, and cut little slits with an exacto knife on the top and bottom of her fist, and inserted a valentine blow pop

Finished Product, pretty cute huh? and just imagine if I had taken the pic outside, how much better!!

DIY Snowman Kit


This idea came from a post on pinterest that you can find Here

Materials Needed:
craft dowels (or old pencils lol)
Sculpey Clay in assorted colors

Just as in the tutorial above, I sculpted all pieces out of sculpey, baked about 20 min at 275 degrees, and glued to sticks (to stick in snowman)

I followed that almost exactly, except that I didn't have dowels on hand, so i used old pencils,


I crumpled a small piece of aluminum foil in the shape of a carrot and covered it with the clay so it wasn't such a thick piece of clay (called bulking out) , and I baked my eyes and buttons flat, and hot glued the pencils on later.


This shows my old chewed on pencils hot glued to back of eyes and buttons


what pieces looked like when done
(I also lightly sealed it with Pledge with Future Acrylic Floor Finish)


We had our first good snow last night, so we got to use our kit this morning!
Just add any old hat and a scarf and there you go! Cutest snowman on the block!!

Old Top Repurposed!!


So, I had this cute short sleeve sweater. . . Which is much too tight.  This is why in the pic I chose to hold it up to me, rather than try it on. LoL.


Using my creative mind, I decided to repurpose it!! Meaning, I decided to transform it from an old ill fitting sweater, into a cute girls sweater dress.

First (no pic of this sorry), I put it over my girl, and pinched the sides together to get an idea of how much smaller it need to be.  I pinched up a bit more than an inch on either side.


I laid the dress flat, inside out and sewed a seam down each arm as shown below (about
 same as I had pinched together on her earlier)


Make sure if you do this that you round out the underarm, and cut the excess off as close to the seam under the arm as possible, so it lays right when turned back inside right.


Once sewn down both sides, trim excess close to seam, and turn inside right.


It was a hit! She loved the dress!


Tuesday, January 15, 2013

DIY Valentines Day Wreath


I saw all these adorable Valentines Day wreaths on pinterest and thought to myself "YES! A way to use some of those old tees I wouldn't throw away!" (I hoard things I think I may someday craft with). So I got my got out my material and went on a hunt for a wire hanger!


The first thing i did was bend the wire hanger into a circle (not as easy as it looked)


Next I dug thru our old tees and found the closest to Valentine colors I could (tossed in a piece of pink gingham check fabric i had also)

I then cut the tees into thin strips (they were about 3 inches long and an inch or less wide)

Starting at one end, i tied the strips in a simple knot (in a repeating pattern) on one at a time

It looks like this, while I was going i would push the knots as tight as I could together, because the overall looks better the fuller it is. 


The finished product.
I thought it was just a bit plain, so i tied on one old Valentines Day ornament I had.


Monday, January 7, 2013

DIY fold down waist Maxi Skirt

Here it is!! The comfy stretchy maxi skirt, with fold over waist. . . and you can make it yourself!! This one took me maybe an hour ;)


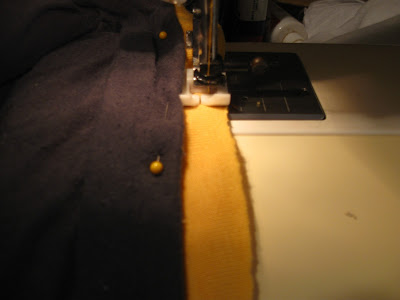
First, select your material! I got i think 2 yards of this mustard yellow stretch jersey material at a local walmart on clearance (love clearance).  Next, pick an existing skirt that fits you well, fold fabric in half with right sides together (good printed sides in, underside out), and lay your skirt on top of material.


Pin it right to the material (or at least thats what it did to keep it from moving, this jersey was tricky).  When it comes to the waist band, fold it down and pin it so you are pinning just the shape of the skirt.


should look like this:


Cut around the skirt (careful not to cut your good skirt) close to the hem (leaving it undone, i like the way jersey hems roll) and leave about an inch or half an inch on the sides and around waistband for seam allowance.


 leave it pinned to help hold together, and carefully sew down both sides. then unpin


 Now for the waistband
Measure your waist. . . add one inch to this. . . then cut that # in half
ie mine was 30 (dont tell please lol) i added 1, making it 31, then cut this in half = 15.5"


fold material in half right sides together again, and cut a rectangle about 10 inches tall x (your measurment) wide.


pin 10 inch side together, and sew down it


turn inside right, and you have a tall circle of fabric

pinch the middle of the cylinder, and fold there, once whole circle is folded in half down middle, you should have a shorter circle, with all seams on the inside :)  This is your waist band.


with skirt still inside out, pin waistband to the skirt, right sides together, start by pinning sides and middle together (skirt should be a bit bigger than waistband and will look gathered)


sew together carefully, slightly stretching waistband to match skirt as needed.
then turn inside right, and voila!!


your own maxi skirt!!


i had enough mateial left to cut a long rectangle about 10" wide or so to make a matching scarf. . . completes the look i think!


Hope you try it and it turns out as comfy as mine!!!
Happy Crafting


Wednesday, January 2, 2013

DIY Felt Play Food Bread


If you have a play kitchen, and you need some play food, bread is a necessity!  All kids like making sandwiches etc.  This is the easy, no sew, cheating way to make them (thats me) lol.
Note:if sewn instead of glued, would look nicer :)

Need:
construction paper
white felt
tan felt
hot glue gun and glue

Start by making a pattern
I drew my bread slice out on construction paper, and cut it out.


trace and cut 4 white bread shapes per slice, stack together


cut long skinny strips out of the tan


i made 4 slices. . . here are all my pieces


next, with 4 pieces of white stacked perfectly together, start, very carefully, glueing the tan strip (crust) around the bread

Note: if sewing, sew to top and bottom bread slice pieces


finished piece


tada!!  they feel real!